1.Low/No direct heat
2.Low manipulation - Only comb/brush on wash days
3.Deep Conditioning weekly.
4.Protective Styles - half wigs, phony ponies, braids, lace fronts, sew ins and crochets. Anything that protects your real hair from you, and everyday styling.
5.No trimming - only dust as needed.
6.Moisturizing and sealing.
7.Last but not least, constantly gaining knowledge and inspiration
Showing posts with label LOOK GOOD FEEL GREAT. Show all posts
Showing posts with label LOOK GOOD FEEL GREAT. Show all posts
Wednesday, September 22, 2010


Thursday, September 2, 2010
Nail Strengtheners and Other Tips for Growing Long Nails
By: Theresa Hall
Well cared for hands help everyone make a great first impression. If you've tried growing longer nails with minimal results, you may want to look to your diet or another underlying medical condition. If you and your diet are healthy, you may want to consider using a nail strengthener before making a commitment to artificial nails or resigning yourself to rough looking hands.
How Do You Know If You Need a Nail Strengthener?
Before you use a nail strengthener, consider potential medical causes for weak nails. You could be having trouble with your nails due to an infection or from poor circulation. It's important to get a doctor's opinion if your nails peel and crack. If your fingernails are discolored, they may be infected, and you may need an antibacterial prescription from your doctor. Circulation problems may be improved with extra massaging of the nail bed or by adjusting your diet, but they can be signs of more serious problems.
Once you have ruled out any health problems, you can look at the two most common reasons for weak fingernails: poor nail protection and poor hydration of the nails. We often think of using a nail strengthener, but it is important that the nail be well hydrated as well. Moisturize your nails often by applying lotions and cuticle oils. Massage the lotion in well to encourage absorption and to stimulate the circulation in the nail. Make sure your diet has enough essential fatty acids and enough protein and B vitamins.
Also get in the habit of protecting your fingernails. When you are using cleaning products, wear gloves to protect your hands and nails. Your fingernails will soften as they are exposed to water, and they will be more prone to tearing. Your hands are exposed to sunlight and chemicals, so it is important to protect them. Always wear sunscreen on your hands and nails when you are outside. Sun damage can harm your fingernails in much the same way as it harms your hair.
If you are following these types of precautions and you still have soft, weak nails, it's time to start using a nail strengthener. You can choose from different types of products. Some are available as a polish, and some can be found in the form of a nail strengthener cream. The form you use is not nearly as important as finding the most effective product for you.
Choosing a Nail Strengthener
Nail strengtheners do not cause your nails to grow. Instead, they protect your nails against splitting and cracking. The best nail strengthener for you will moisturize as well as harden the nail, as both conditions are necessary for healthy nails. Because your nails will be more resistant to damage, it is more likely that they can grow longer.
One type of nail strengthener is a protein strengthener. Check the ingredient list for hydrolyzed collagen or proteins. These proteins help form a protective barrier that prevents the nail from losing moisture. A protein strengthener is usually safe for those with allergies, but you should always test the product on one nail first to check for a reaction.
If your nails aren't overly dry, you can try a nail strengthener with nylon. This type of strengthener is especially good for soft and damaged nails. It bonds with the nail to strengthen the texture of the fingernail. Nylon has a very low risk of allergies as well.
Some nail strengtheners will contain formaldehyde. This kind of nail strengthener is powerful, but it can have harsh side effects. If you experience an allergic reaction, discontinue use immediately. See your doctor if symptoms persist or worsen. It is easy to avoid formaldehyde, as companies offer formaldehyde-free nail strengthening formulas.
Many nail strengtheners are in a polish form that should be applied twice a week. Use thin coats, and apply it as a layer underneath your regular polish. Avoid removing nail strengtheners with acetone polish removers. Always use a non-acetone remover to prevent damage from overdrying. You can also use a nail strengthening cream, which can be applied daily.
What About Diet?
Eating a healthy diet is certainly helpful for strengthening nails. Several nutrients are particularly beneficial to strong nails. Eat plenty of protein from sources like yogurt, meat, eggs, soy and nuts. B vitamins, especially biotin, are good for nail growth. Soy and eggs are both rich in biotin, as well as whole grains and liver. Sulphur minerals like apples, grapes, garlic and onions are especially good for strong fingernails. Calcium is also important to healthy nails and is found in dairy products and broccoli.
Last of all, make sure your diet contains plenty of water. Moisture loss will cause your nails to be brittle and break easily. Believe it or not, your daily coffee may be affecting your nails. Avoid caffeinated beverages because they can leave you dehydrated.
Article Source: http://www.life123.com/beauty/grooming/nail-care/do-you-need-a-nail-strengthener.shtml - Nail Strengtheners and Other Tips for Growing Long Nails
Well cared for hands help everyone make a great first impression. If you've tried growing longer nails with minimal results, you may want to look to your diet or another underlying medical condition. If you and your diet are healthy, you may want to consider using a nail strengthener before making a commitment to artificial nails or resigning yourself to rough looking hands.
How Do You Know If You Need a Nail Strengthener?
Before you use a nail strengthener, consider potential medical causes for weak nails. You could be having trouble with your nails due to an infection or from poor circulation. It's important to get a doctor's opinion if your nails peel and crack. If your fingernails are discolored, they may be infected, and you may need an antibacterial prescription from your doctor. Circulation problems may be improved with extra massaging of the nail bed or by adjusting your diet, but they can be signs of more serious problems.
Once you have ruled out any health problems, you can look at the two most common reasons for weak fingernails: poor nail protection and poor hydration of the nails. We often think of using a nail strengthener, but it is important that the nail be well hydrated as well. Moisturize your nails often by applying lotions and cuticle oils. Massage the lotion in well to encourage absorption and to stimulate the circulation in the nail. Make sure your diet has enough essential fatty acids and enough protein and B vitamins.
Also get in the habit of protecting your fingernails. When you are using cleaning products, wear gloves to protect your hands and nails. Your fingernails will soften as they are exposed to water, and they will be more prone to tearing. Your hands are exposed to sunlight and chemicals, so it is important to protect them. Always wear sunscreen on your hands and nails when you are outside. Sun damage can harm your fingernails in much the same way as it harms your hair.
If you are following these types of precautions and you still have soft, weak nails, it's time to start using a nail strengthener. You can choose from different types of products. Some are available as a polish, and some can be found in the form of a nail strengthener cream. The form you use is not nearly as important as finding the most effective product for you.
Choosing a Nail Strengthener
Nail strengtheners do not cause your nails to grow. Instead, they protect your nails against splitting and cracking. The best nail strengthener for you will moisturize as well as harden the nail, as both conditions are necessary for healthy nails. Because your nails will be more resistant to damage, it is more likely that they can grow longer.
One type of nail strengthener is a protein strengthener. Check the ingredient list for hydrolyzed collagen or proteins. These proteins help form a protective barrier that prevents the nail from losing moisture. A protein strengthener is usually safe for those with allergies, but you should always test the product on one nail first to check for a reaction.
If your nails aren't overly dry, you can try a nail strengthener with nylon. This type of strengthener is especially good for soft and damaged nails. It bonds with the nail to strengthen the texture of the fingernail. Nylon has a very low risk of allergies as well.
Some nail strengtheners will contain formaldehyde. This kind of nail strengthener is powerful, but it can have harsh side effects. If you experience an allergic reaction, discontinue use immediately. See your doctor if symptoms persist or worsen. It is easy to avoid formaldehyde, as companies offer formaldehyde-free nail strengthening formulas.
Many nail strengtheners are in a polish form that should be applied twice a week. Use thin coats, and apply it as a layer underneath your regular polish. Avoid removing nail strengtheners with acetone polish removers. Always use a non-acetone remover to prevent damage from overdrying. You can also use a nail strengthening cream, which can be applied daily.
What About Diet?
Eating a healthy diet is certainly helpful for strengthening nails. Several nutrients are particularly beneficial to strong nails. Eat plenty of protein from sources like yogurt, meat, eggs, soy and nuts. B vitamins, especially biotin, are good for nail growth. Soy and eggs are both rich in biotin, as well as whole grains and liver. Sulphur minerals like apples, grapes, garlic and onions are especially good for strong fingernails. Calcium is also important to healthy nails and is found in dairy products and broccoli.
Last of all, make sure your diet contains plenty of water. Moisture loss will cause your nails to be brittle and break easily. Believe it or not, your daily coffee may be affecting your nails. Avoid caffeinated beverages because they can leave you dehydrated.
Article Source: http://www.life123.com/beauty/grooming/nail-care/do-you-need-a-nail-strengthener.shtml - Nail Strengtheners and Other Tips for Growing Long Nails
My Nails...

Im on a new mission to have longer nails that dont break from the slightest bump. My nails are fully manicured once a week. My manicure consists of...
1. Removing any old nail polish
2. Trim and file (glass file from Walgreens)
3. Smooth nail beds with a Buffer Block
4. Remove cuticles with this...

6. Scrub my hands with a mixture of sugar and grapeseed oil
7. Parrifin Treatment

9. Apply nail treatment
10. Polish nails
Friday, July 24, 2009


Tuesday, June 30, 2009
NAILS:::
 PURE ICE::: NEW LILAC
 PURE ICE::: FRENCH KISS
 PURE ICE::: EXCUSE ME
 PURE ICE:::: FLIRT ALERT
 LA GIRLS DISCO::: TURNTABLE
LEMON AND SUGAR FACIAL SCRUB
 I HAVE TO THANK POKA FOR ANOTHER FACIAL HIT!
SHE ORIGINALLY GOT THIS FROM THE QUEENOFBLENDING ON YOUTUBE AND I GOT IT FROM HER. THE INSTRUCTION ARE SIMPLE AND ITS BEST TO ALREADY HAVE A SOLID SKINCARE REGIMEN AND ADD THIS A TREAT FOR YOU FACE!
USE REAL LEMON JUICE FROM AN ACTUAL LEMON (NOT THE BOTTLED STUFF)
CUT THE LEMON IN HALF AND SQUEEZE A PALM FULL OF JUICE INTO YOUR HAND, THAN ADD A BIT OF SUGAR
I FOUND THE BEST WAY FOR ME TO DO THIS IS AT NIGHT RIGHT BEFORE BED.
APPLY THE SCRUB AND SCRUB GENTLY,
THEN LET IT SIT ON YOUR FACE WHILST YOU ARE IN THE SHOWER AND LET THEN STEAM WORK ITS MAGIC.
NEXT RINSE IT OFF (DONT JUST WIPE IT OFF WITH THE TOWEL, ACTUALLY RINSE WITH COOL WATER)
APPLY YOUR MOISTURIZER (IT'LL SOAK IN LIKE NOBODYS BUSINESS!!!)
WAKE UP TO SOFT REFRESHED SKIN
SOME LADIES NOTICED THAT THEIR BLEMISHES FADED IN ONE USE. I DIDNT THOUGH IVE USED THIS 3-4 TIMES SINCE I FOUND OUT ABOUT IT AND MY NEWER BLEMISHES FADED, BUT THE OLDER ONES ARE TAKING THEIR TIME, BUT STILL FADING ALL THE SAME....
QUEENIFBLENDING RECOMMENDS USING THIS SCRUB TWICE A MONTH (I THINK) BUT IVE USED IT TWICE A WEEK WITH NO PROBLEMS... IVE ALSO BEEN USING THE HONEY AND CINNAMON MASK AS A SPOT TREATMENT WITH GREAT RESULTS
AS ALWAYS THERE ARE MANY THINGS THAT I COULD DO TO ASSIST IN MY SKIN PROBLEMS, LIKE DRINKING MORE WATER.. IM WORKING ON THAT!
REMEMBER WHEN TRYING SOMETHING NEW ALWAYS DO A PATCH TEST. WHAT WORKS FOR ME COULD BE A DISASTER FOR YOU!
Monday, June 8, 2009
UPDATES:
OK IM BACK AND HERE ARE SOME MUCH NEEDED HAIR AND NAIL UPDATES!!!!
 PURE ICE TAUPE DRAWER
 PETITES CHERRY SLUSH
 PETITES BLACKBERRY
 PETITES PINK VELVET
 NYC BRYANT PARK
 PURE ICE ENVY
 THIS IS MY NEW HAIR MOISTURIZER!!!!
Water, Brassica Napus Oil (Canola), Helianthus Annuus (Sunflower) Seed Oil, Glycerin, Aloe Barbadensis Leaf Juice, Ascorbic Acid (Vitamin C), Retinyl Palmitate (Vitamin A), Tocopheryl Acetate (Vitamin E), Pyridoxine Hydrochloride (Vitamin B6), Cholecalciferol (Vitamin D), Melaleuca Alternifolia (Tea Tree) Leaf Oil, Arctium Majus (Burdock) Root Extract, Calendula Officinalis Flower Extract, Chamomilla Recutita (Matricaria) Flower Extract, Honey Extract, Seaweed Extract, Symphytum Officinale (Comfrey) Leaf Extract, Hydrastis Canadensis (Goldenseal) Root Extract, Tilia Cordata (Linden) Flower Extract, Zea Mays (Corn) Oil, PEG 16 Macadamia Glycerides, Sorbitan Monooleate, Octyldodecanol, Silica, Acrylates/C10 30 Alkyl Acrylate Crosspolymer, Disodium EDTA, Carbomer, Sodium Propoxyhydroxypropyl Thiosulfate Silica, Phenoxyethanol, Butylparaben, Isobutylparaben, Propylparaben, Ethylparaben, Methylparaben, Triethanolamine, Fragrance
 I DID A ROLLERSET AND DECIDED TO IRON JUST THIS ONE PIECE... (MID MAY)

NEWEST PROGRESSION! IM ALMOST BSB!!! NO BC! TTYL!!! MWAHS!!!
 PURE ICE TAUPE DRAWER
 PETITES CHERRY SLUSH
 PETITES BLACKBERRY
  PETITES PINK VELVET
 NYC BRYANT PARK
 PURE ICE ENVY
 THIS IS MY NEW HAIR MOISTURIZER!!!!
Water, Brassica Napus Oil (Canola), Helianthus Annuus (Sunflower) Seed Oil, Glycerin, Aloe Barbadensis Leaf Juice, Ascorbic Acid (Vitamin C), Retinyl Palmitate (Vitamin A), Tocopheryl Acetate (Vitamin E), Pyridoxine Hydrochloride (Vitamin B6), Cholecalciferol (Vitamin D), Melaleuca Alternifolia (Tea Tree) Leaf Oil, Arctium Majus (Burdock) Root Extract, Calendula Officinalis Flower Extract, Chamomilla Recutita (Matricaria) Flower Extract, Honey Extract, Seaweed Extract, Symphytum Officinale (Comfrey) Leaf Extract, Hydrastis Canadensis (Goldenseal) Root Extract, Tilia Cordata (Linden) Flower Extract, Zea Mays (Corn) Oil, PEG 16 Macadamia Glycerides, Sorbitan Monooleate, Octyldodecanol, Silica, Acrylates/C10 30 Alkyl Acrylate Crosspolymer, Disodium EDTA, Carbomer, Sodium Propoxyhydroxypropyl Thiosulfate Silica, Phenoxyethanol, Butylparaben, Isobutylparaben, Propylparaben, Ethylparaben, Methylparaben, Triethanolamine, Fragrance
 I DID A ROLLERSET AND DECIDED TO IRON JUST THIS ONE PIECE... (MID MAY)
NEWEST PROGRESSION! IM ALMOST BSB!!! NO BC! TTYL!!! MWAHS!!!
Tuesday, May 12, 2009
HAIR UPDATE, AUSSIE 3 MINUTE MIRICLE RECONSTRUCTOR, NEW NAIL POLISH
I TRIED A NEW NAIL COLOR (OF COURSE)... HERES SOME PICS....
 NYC::: TIMES SQUARE TANGERINE (NO FLASH)
 NYC::: TIMES SQUARE TANGERINE (SUNLIGHT)
 NYC::: TIMES SQUARE TANGERINE (WITH FLASH)
 I FINALLY TRIED THE AUSSIE MOIST 3 MINUTE MIRACLE RECONSTRUCTOR AND I LIKE IT... I'LL USE A FEW MORE TIMES BUT THIS MAY BE MY PROTIEN MAINSTAY SINCE THE ROUX HAIR REPAIR TREATMENT IS SO HARD TO FIND ON THE GROUND.... WE SHALL SEE...
 TOWEL DRIED HAIR NO PRODUCT
 TOWEL DRIED HAIR NO PRODUCT
 NYC::: TIMES SQUARE TANGERINE (NO FLASH)
 NYC::: TIMES SQUARE TANGERINE (SUNLIGHT)
 NYC::: TIMES SQUARE TANGERINE (WITH FLASH)
 I FINALLY TRIED THE AUSSIE MOIST 3 MINUTE MIRACLE RECONSTRUCTOR AND I LIKE IT... I'LL USE A FEW MORE TIMES BUT THIS MAY BE MY PROTIEN MAINSTAY SINCE THE ROUX HAIR REPAIR TREATMENT IS SO HARD TO FIND ON THE GROUND.... WE SHALL SEE...
  TOWEL DRIED HAIR NO PRODUCT
 TOWEL DRIED HAIR NO PRODUCT
 SO I'VE BEEN DOING TWISTS AND TWIST OUTS AS MY MAIN HAIRSTYLE. THE MOVERS STILL HAVENT DELIVERED MY THINGS WHICH MEANS NO DRYER FOR ROLLERSETS, MY HAIR PROBABLY NEEDED THE BREAK ANYWAY SO NO BIG DEAL THERE... MY TWIST ROUTINE CONSISTS OF...
CO-WASH
WRAP HAIR IN A TOWEL (LOOKING FOR A GOOD MICRO-FIBER ONE)
SECTION HAIR IN HALF (AT THE EAR)
STARTING WITH THE BACK::: SPRAY WATER, APPLY VO5 TEA THERAPY BLACKBERRY & SAGE, DETANGLE IF NEEDED, APPLY COCONUT OIL, TWIST, USE PERM RODS AS NEEDED
IT TAKES A FULL 24 HOURS FOR THEM TO DRY SO I TRY (EMPHASIS ON TRY) TO LEAVE THEM TWISTED FOR AT LEAST 2 DAYS, THEN AFTER THEY ARE UN TWISTED I JUST LET IT GET BIGGER AND BIGGER UNTIL IT DOESNT LOOK GOOD ANYMORE (ABOUT 4 DAYS), THEN I PUT IT IN A PUFF PONYTAIL...
THATS BEEN MY ROUTINE FOR ABOUT A MONTH NOW...
Monday, May 11, 2009
MORE NAILS
SO I CHANGED MY MANI TWICE OVER THE WEEKEND AND HERES WHAT I ENDED UP WITH....
 SALLY HANSEN EXTREME WEAR::: GUNMETAL
 PETITES::: BRONZE BABY
 SALLY HANSEN EXTREME WEAR::: GUNMETAL
 PETITES::: BRONZE BABY
TIS ALL!
Friday, May 8, 2009
UPDATES
HEY PEEPS!
I'VE BEEN GONE FOR A LONG TIME! I KNOW YOU'VE MISSED ME! BETWEEN A LAST MINUTE RELOCATION AND FINALS I'VE BEEN SWAMPED! SO ANYHOOS ON TO THE BUSINESS...
THE HAIR: IT'S FINE, I'VE MOVED BACK DOWN SOUTH AND IM STILL NOT SURE IF THE EXTRA HUMIDITY WILL HELP OR HINDER ME... I'VE BEEN DOING TWIST AND TWISTOUTS... NO NEW PRODUCTS...
MY NEW OBSESSION!!! NAILS!!!! HERES SOME PICS
 NYC::: EAST VILLAGE
 SALLY HANSEN::: REAL ROYAL
 PURE ICE::: KISS ME HERE
 MILANI::: PINK LADY
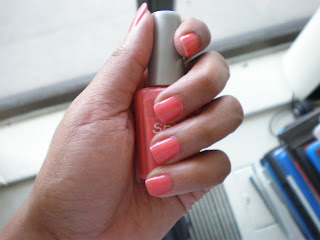
I'VE BEEN GONE FOR A LONG TIME! I KNOW YOU'VE MISSED ME! BETWEEN A LAST MINUTE RELOCATION AND FINALS I'VE BEEN SWAMPED! SO ANYHOOS ON TO THE BUSINESS...
THE HAIR: IT'S FINE, I'VE MOVED BACK DOWN SOUTH AND IM STILL NOT SURE IF THE EXTRA HUMIDITY WILL HELP OR HINDER ME... I'VE BEEN DOING TWIST AND TWISTOUTS... NO NEW PRODUCTS...
MY NEW OBSESSION!!! NAILS!!!! HERES SOME PICS
 NYC::: EAST VILLAGE
 SALLY HANSEN::: REAL ROYAL
 PURE ICE::: KISS ME HERE
 MILANI::: PINK LADY
WET AND WILD::: BLAZE
Monday, April 6, 2009
S.A.A. Update
So I recently was compelled to try falsies for a more dramatic look. Well you couldn't even tell I had them on! They looked just like my real eyelashes. So today I remembered I've been using saa since around valentines day, and well it must be working. I'd forgotten because I put saa in all my mascaras, so I kinda just forgot... I don't have to use nearly as much to get the desired effect. Just 2 coats and curl... I KNOW THESE ARENT THE BEST COMPARISONS, BUT TAKE MY WORD.. YOU COULDNT TELL... Tis all hunnies!
 WITHOUT
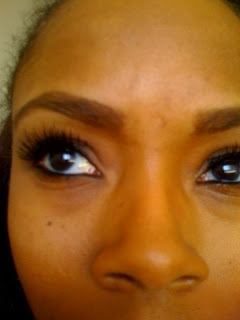 WITH
WITH
 WITHOUT
 WITH
WITHMonday, March 30, 2009
PLAY UP YOUR EYES!

IM STILL TRYING TO GET TO THAT GIRL STATUS AND IN DOING SO IM GETTING ALL THE CORRECT INFO AND PASSING IT ALONG TO YOU!
HERES HOW THE PROS SAY YOUR BROWS SHOULD BE SHAPED...

HERES HOW MINE ARE SHAPED... THEY ARE A LITTLE OFF... AM I GOING TO FIX THEM? HELL NO! IVE WORKED HARD TO GET MY BROWS THE WAY I WANT THEM, AND THEY ARENT JACKED-UP BY ANY MEANS SO IM KEEPING THEM JUST THE WAY THEY ARE.. REMEMBER EVEN WHEN U GET THE BEST ADVICE YOU STILL NEED TO DO YOU! NOW WITH THAT SAID DONT BE IN DENIAL ABOUT YOUR BROWS, AND DONT BE AFRAID TO LET THEM GROW OUT AND START FROM STRATCH!
 ALL ABOUT EYESHAPES
ALMOND EYES
1. Apply a light shade from lash line to the brow.
2. Apply a medium contour shade on the lid.
3. Next use a darker shadow on the outer corner of the lid and blend well.
4. Line the eyes if desired closest to the lash line as possible top and bottom.
5. Apply mascara top and bottom and comb well.
2. Apply a medium contour shade on the lid.
3. Next use a darker shadow on the outer corner of the lid and blend well.
4. Line the eyes if desired closest to the lash line as possible top and bottom.
5. Apply mascara top and bottom and comb well.


1. Apply a light color shadow on the inner half of the upper lid from lash to brow.
2. Extend a medium shade on outer half of the eyelid towards hairline and blend well.
3. Begin lining the eye at the inner corner extending a touch beyond the outer edge.
4. Dot highlighter in the inner corner of the eye.
5. Apply mascara to upper lashes and lower if desired. If you use mascara on lower lashes use only on outer few.
DEEP SET  1. Use a light shade from lash to brow.
2. Place a medium contour color just above the crease and blend upward.
3. Dot highlighter on inner corners of eyes.
4. When applying eyeliner stay as close to the lash line as possible. Less is best with deep-set eyes.
5. Apply mascara to upper and lower lashes and comb through with metal lash comb, lash groomer or deluxe spooly mascara brush.
 1. Use a light shade from lash to brow.
2. Place a medium contour color just above the crease and blend upward.
3. Dot highlighter on inner corners of eyes.
4. When applying eyeliner stay as close to the lash line as possible. Less is best with deep-set eyes.
5. Apply mascara to upper and lower lashes and comb through with metal lash comb, lash groomer or deluxe spooly mascara brush.
DOWN TURNED

1. Apply a light to medium shade from lash to brow.
2. Place a medium or dark shadow near the eyes' inner corners continuing out toward the temples.
3. Extend the liner all the way to the inner corner of the eye closest to the lashes.
4. Then applying mascara concentrate on the center lashes.
WIDE SET

1. Apply a light to medium shade from lash to brow.
2. Place a medium or dark shadow near the eyes' inner corners continuing out toward the temples.
3. Extend the liner all the way to the inner corner of the eye closest to the lashes.
4. Then applying mascara concentrate on the center lashes.
FIGURE OUT YOUR FACE SHAPE FOR HAIR
THIS COULD VERY WELL BE THE FIRST STEP IN FIGURING OUT SIGNATURE HAIRSTYLES AND MAKEUP. I KNOW YOU'VE SEEN SOMEONE WITH THE A BANGING 'FIT ON, BUT SOMETHING WAS OFF AND YOU COULDNT PUT YOUR FINGER ON IT.. IT MAY HAVE BEEN THE SIDE OF THIER HEAD THIER PART WAS ON... READ THE WHOLE ARTICLE IN ITS ENTIRETY HERE.
TRIANGULAR

SQUARE
 ROUND
ROUND
 OVAL
OVAL
 HEART
HEART
 DIAMOND

OBLONG
 GET OUT THE TAPE MEASURE:
While there are lots of suggestions on how to figure out your shape, from outlining your face on a mirror with lipstick to draping it with a towel and asking others to help you guess the shape, there is actually a scientific way to determine your face shape once and for all.
To find out the shape of your face measure it with a tape measure or ruler. You will take the following measurements.
1. Measure your face across the top of your cheekbones. Write down the measurement on a piece of paper.
2. Measure across your jaw line from the widest point to the widest point. Write down the measurement.
3. Measure across your forehead at the widest point. Generally the widest point will be somewhere about halfway between your eyebrows and your hairline. Write down the measurement.
4. Measure from the tip of your headline to the bottom of your chin.
If you are still not sure of the results, ask a friend that you trust to help you determine your shape. Or ask your stylist. Don't forget that everyone will have their own opinion. If you get mixed opinions ask several people until you see a trend.
Another way to find your shape is to study the faces of celebrities to compare your own look. Many celebrities are almost as famous for their face shape as their hair color, length and style.
FACE DIMENSIONS:
Listed below are the most common shapes besides round. It is possible that your face may not fit exactly into any one category and may be a combination of shapes.
Most people will fit into one of the major categories which include:
Oval Face - Length equal to one and a half times width. An oval face may change according to weight gain or loss and age. It is common for people who have a classic oval face to have small features.
Round Face - If you have a round face your face will be as wide as it is long. This may vary a little where your face is not quite as wide as it is long, but within 1/4 to 1/2 inches.
Long/Rectangular - Longer than it is wide.
Heart - Narrow at jaw line, wide at forehead and cheekbones.
Square - If you have a square shape your forehead, jaw line and cheekbones are almost equal in width.
Triangular - Wider forehead that narrows gradually to a slightly pointed or rounded chin.
Diamond - Wide cheeks, narrow forehead and jaw line. May have a pointed chin.
Pear - Wide chin with a narrow forehead.
ONCE YOU HAVE EVERYTHING FIGURED OUT CLICK HERE TO FIND A CUTE AND FLATTERING HAIRSTYLE
TRIANGULAR

SQUARE
 ROUND
ROUND OVAL
OVAL HEART
HEART DIAMOND
OBLONG
 GET OUT THE TAPE MEASURE:
While there are lots of suggestions on how to figure out your shape, from outlining your face on a mirror with lipstick to draping it with a towel and asking others to help you guess the shape, there is actually a scientific way to determine your face shape once and for all.
To find out the shape of your face measure it with a tape measure or ruler. You will take the following measurements.
1. Measure your face across the top of your cheekbones. Write down the measurement on a piece of paper.
2. Measure across your jaw line from the widest point to the widest point. Write down the measurement.
3. Measure across your forehead at the widest point. Generally the widest point will be somewhere about halfway between your eyebrows and your hairline. Write down the measurement.
4. Measure from the tip of your headline to the bottom of your chin.
If you are still not sure of the results, ask a friend that you trust to help you determine your shape. Or ask your stylist. Don't forget that everyone will have their own opinion. If you get mixed opinions ask several people until you see a trend.
Another way to find your shape is to study the faces of celebrities to compare your own look. Many celebrities are almost as famous for their face shape as their hair color, length and style.
FACE DIMENSIONS:
Listed below are the most common shapes besides round. It is possible that your face may not fit exactly into any one category and may be a combination of shapes.
Most people will fit into one of the major categories which include:
Oval Face - Length equal to one and a half times width. An oval face may change according to weight gain or loss and age. It is common for people who have a classic oval face to have small features.
Round Face - If you have a round face your face will be as wide as it is long. This may vary a little where your face is not quite as wide as it is long, but within 1/4 to 1/2 inches.
Long/Rectangular - Longer than it is wide.
Heart - Narrow at jaw line, wide at forehead and cheekbones.
Square - If you have a square shape your forehead, jaw line and cheekbones are almost equal in width.
Triangular - Wider forehead that narrows gradually to a slightly pointed or rounded chin.
Diamond - Wide cheeks, narrow forehead and jaw line. May have a pointed chin.
Pear - Wide chin with a narrow forehead.
ONCE YOU HAVE EVERYTHING FIGURED OUT CLICK HERE TO FIND A CUTE AND FLATTERING HAIRSTYLE
Subscribe to:
Posts (Atom)